Of all the plants that I've dyed with, I had the most fun and (arguably) the
best results with jewelweed (impatiens capensis), also known
as "Touch-Me-Nots." Most people are familiar with jewelweed as a
natural remedy for poison ivy, but I was thrilled to discover a lesser
known use: its stalks and leaves make a beautiful, colorfast, dusky
pale-orange dye. I think of it as the color of a ripe cantaloupe.

Below, I've written up a full account of every step: preparing the fiber for dye with a
mordant, making the dye, and dyeing the fiber. The same methods can be
used to dye protein fibers with many other plants in the "weed family," such as Goldenrod or Queen Anne's
Lace. Dyeing cellulose fiber (cotton, linen, etc.) or dyeing with other plants (notably berries) requires a slightly different process.
It will take quite some time to do this
properly. I've included directions for dyeing both with and without a heat source. Depending on the method you choose, it will take anywhere from several hours up to several days. The heated method is quicker, but you'll still get best results if you take a break between
steps to let things cool down overnight.
To repeat the steps I followed, you will need:
- Jewelweed, or other plantstuff
- Wool (or other protein fiber) to be dyed
- Lots of water
- Alum
- Vinegar (optional)
- Cream of tartar (optional)
- Large, ideally non-reactive pot
- Strainer
- Extra pots or buckets
- Heat source (optional)
- Rubber gloves (optional)
Step 1: Choose and Weigh Your Fiber
Wool takes natural dyes very well, if treated
properly. You probably won't have as much success with other natural
fiber types; you're welcome to experiment, but generally wool will give you the brightest and most saturated results. I have followed the steps outlined here more than once, with different types of wool; the first time I used Romney fleece, and the second time Cheviot.
You can use the same steps to dye raw (scoured)
fleece, un-spun roving, yarn, or a finished knit or woven product. More
care must be taken with fleece and roving to prevent felting, but the
dye will work just the same at any stage. Whatever you choose to dye, weigh it dry before you move on to the next step. This will be important for determining what amounts of other ingredients to use.
Note: Fiber felts with the combination of heat, water, and agitation. At certain stages of this project, your fiber may be both wet and very hot. Be very gentle with the fiber at those stages. At all costs avoid stirring, squeezing, wringing, or poking fiber when it's hot and/or wet. Don't even touch it any more than absolutely necessary. If felting or shrinking is a major concern, choose the non-heated methods described below.
Step 2: Pre-Soak Fiber
After you recorded how much your wool weighs
when it's dry, start by soaking it for an hour in enough liquid to cover the fiber and get it fully saturated. You can use plain water, or a solution of 4 parts
water to 1 part vinegar to encourage dye absorption.

Why this step? Fibers need to be
wet before they're put in a dye bath or a mordant solution, for best
results and for even absorption. Natural dyes with wool often work
better if they're acidic, hence the vinegar. But you don't need to go
overboard; using TOO much vinegar may damage the wool instead of helping
it. To be honest, I have gotten good results without including the vinegar at this stage.
Step 3: Pre-Mordant Fiber
Before you actually dye your fiber, you will
need to prepare it with a "mordant." The word mordant comes from the Latin verb meaning "to bite." It's a fitting appellation, because the mordant helps the dye "bite" into the fiber.


A mordant is a solution that chemically bonds to both the wool and to the dye, acting like glue to make them stick together. The alum, more properly potassium aluminum sulfate, is the main active ingredient. The cream of tartar helps it out and brightens the color a bit. Both can be found in the spice section of the grocery store, or ordered (much cheaper in bulk) online. How much you need depends on the amount of fiber you're dyeing. Be sure to use the dry weight of your fiber to calculate the amounts to use. You'll find different recipes, but I follow these basic ratios:


A mordant is a solution that chemically bonds to both the wool and to the dye, acting like glue to make them stick together. The alum, more properly potassium aluminum sulfate, is the main active ingredient. The cream of tartar helps it out and brightens the color a bit. Both can be found in the spice section of the grocery store, or ordered (much cheaper in bulk) online. How much you need depends on the amount of fiber you're dyeing. Be sure to use the dry weight of your fiber to calculate the amounts to use. You'll find different recipes, but I follow these basic ratios:
- 8% alum to weight of fiber
- 7% cream of tartar to weight of fiber
- for every 4 ounces (113 g) of wool fiber, use 1.5 tsp alum and 1.5 tsp cream of tartar.
Cold method: Simply skip the heat, and let the fiber soak in the pot overnight. To be honest, I've only read about the cold-mordant method. Though I haven't tried it myself (yet), I'm inclined to believe that it works since I've seen excellent results with cold dyes.
Why this step? If you skip this step, the dye
will probably be very pale or it may even wash out right away. Some natural dyes
(black walnut, indigo, turmeric) don't require a mordant, but most do. Once
you have mordanted your fiber, it is permanently altered. You can dry it
at this stage and store it to dye later, or you can keep it wet and put
it right into a dye bath.
Note: Alum doesn't affect the color of the dye, but there are other chemicals that you can use as mordants, which DO change the color. Using an iron sulfate solution with jewelweed, for instance, will produce a dark green color instead of a dusky orange.
Step 4: Collect Jewelweed (or other dyestuff)
While your fiber is mordanting, you can get started on the dyebath. Locate a stand of jewelweed, which commonly
grows in partially-shaded, damp wooded areas throughout eastern North America and
blooms in May through October.

Cut or pick the entire plant
except for the roots, which are full of mud and dirt when pulled up.
Jewelweed has orange or yellow flowers, but the dye actually comes from
the stalk and leaves. You can pick jewelweed for dyeing throughout the
summer, even before the flowers start to show up!
Fill your dye
pot if you can, but in any case be sure to collect at least twice as
much plant material as the fiber you plan to dye, by dry weight. The same goes for Goldenrod, Queen Anne's Lace, or other similar weedy dyestuff that you choose to experiment with.
Step 5: Make the dye bath
Fill a large pot with enough water to cover the
plant matter. As before, you can proceed in two different ways, and it doesn't make much of a difference which one you choose. The main difference is the time it takes.
Hot method: If you're in a hurry, or just generally impatient, go with this option. Bring the pot to a simmer, and keep it simmering just under a
boil for an hour or two. At this point you can check the dye bath to
make sure you're getting good color out of the jewelweed. The water
should have turned bright orange. Turn the heat off, and allow it to
cool a bit.


Cold method: Simply let the pot stand for 3-4 days. No heat is required, but it will take considerably more time if you don't simmer it. This is easier if you have the patience, and it works better if you can't use a stove-top. This is also the method to choose if you're especially concerned about shrinking, felting, or otherwise distorting your fiber.

Whichever method you choose, eventually the result is the same: you'll end up with a pot of very orange liquid. I've done it both ways, and I have seen absolutely zero difference in the results. Either way, you'll need to strain out the plant matter once you're done, leaving a clean dye bath. If you heated it, make sure to let it fully cool down to room temperature before proceeding. You
won't want to "shock" your fiber: sudden temperature changes can cause
it to felt. (I admit, I've rushed through this step before and used hotter dye than I should have, but I've only done it with the kind of wool that tends to resist felting.)
Note: Keep in mind that the orange of the jewelweed dye is much brighter than the finished product will be. It may look bright at this stage, but no matter what you'll end up with a duskier, less saturated color.
Step 6: Simmer (or Soak) Fiber in Dyebath
Again, you have two options: the quick heat, or the slow soak.
Hot method: Gently place your room-temperature,
pre-mordanted fiber into your room-temperature dye pot. Bring it back
up to a simmer, and keep it at a simmer just under boiling for an hour.
Turn off the heat, and let it cool in the pot.

Note: It may seem repetitive and pointless to let everything cool down, only to heat it up again. But it's worth being patient. The extra steps will keep your fiber in the best possible condition, and to allow time for the mordant to set and take up as much dye as possible for the most saturated results.
Cold method: Put your room-temperature, soaked fiber into a pot of room-temperature dye, and simply let it sit there for several days. Again, I have done it both ways, and I saw absolutely zero difference in the outcomes.

Step 7: Rinse Dyed Fiber in Clean Water
Have a second pot or bucket on hand, filled
with clean room temperature water. After the dye pot has cooled to room
temperature, remove the dyed fiber from the pot and gently place it in the
clean water. Let it soak to release the extra dye that hasn't bonded to
the fiber, and then repeat this step. Remove the fiber and place it in a
pot of clean water, repeating until the water runs clear.


When little to no more dye seems to be coming out, optionally add a very small amount of mild soap (such as Dawn or Eucalan, if you have it) before the final rinse.
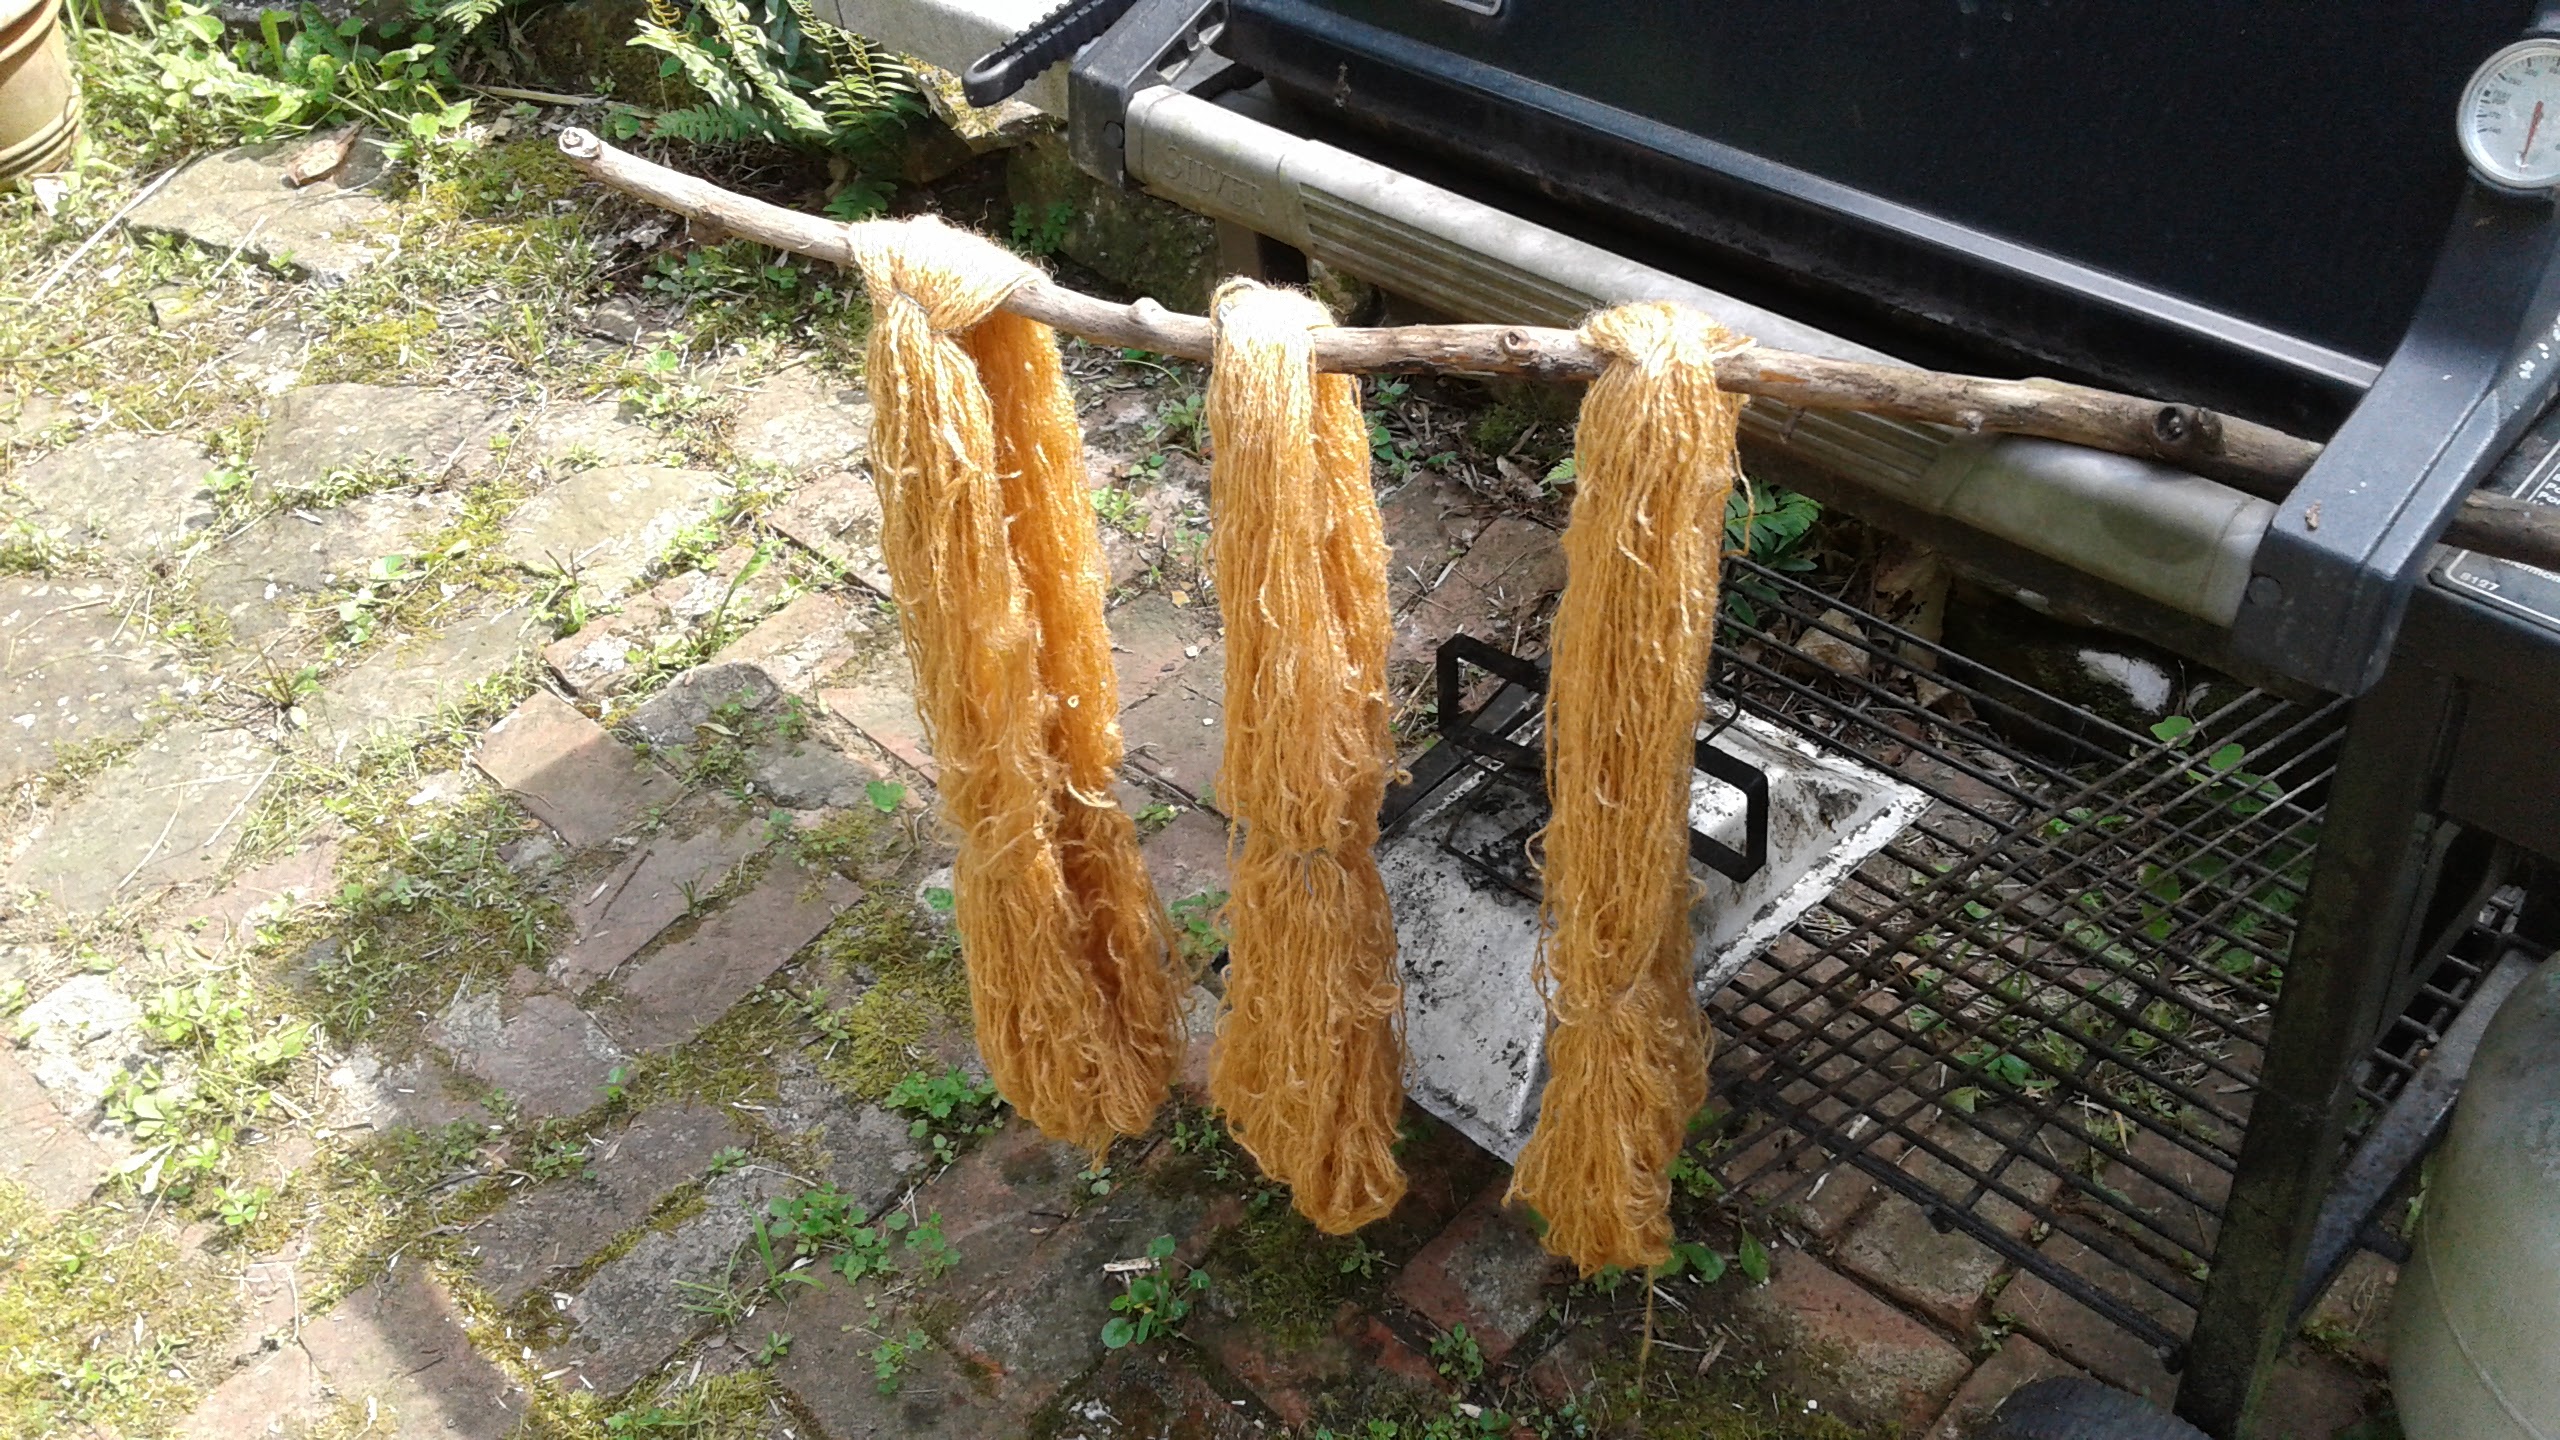
Step 8: Hang the yarn, or spread out the fiber to dry
Find a place to hang your fiber to dry. Observe my extremely sophisticated stick-in-grill contraption below. Resist
the urge to wring it out right away. Even without heat, too much
agitation will cause it to stretch and/or felt even at this stage. If you've dyed yarn or fabric, gently roll it in a towel and press it to remove the excess water. Then simply hang it up or lay it out flat and wait. If you've dyed unspun fleece, lay it on a drying rack.
In
general it's a good idea to keep natural-dyed products out of direct
sunlight as much as possible, to prevent fading. That said, I hung my
jewelweed skeins in the sun for faster drying, and the dye held up just
fine.
If you don't plan to spin/knit/crochet/weave it up right away, store your fiber out of the sun, just to be on the safe side. Natural dyes do generally fade after time, but in my experience jewelweed makes a dye that is quite colorfast and lightfast. I have seen no fading in the project featured in this tutorial, and years have passed since I dyed it. On the other hand, different lighting makes a huge difference.

Step 10: Stash Your Dyed Fiber, or Use It!
Congratulations, you are done!
If you don't plan to spin/knit/crochet/weave it up right away, store your fiber out of the sun, just to be on the safe side. Natural dyes do generally fade after time, but in my experience jewelweed makes a dye that is quite colorfast and lightfast. I have seen no fading in the project featured in this tutorial, and years have passed since I dyed it. On the other hand, different lighting makes a huge difference.
Sometimes it looks like a rich orange, and sometimes the very same yarn looks like a bland orange-tan. It's subtle, and beautiful when you catch it at the right time.
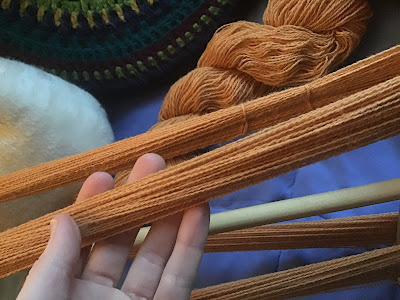
First batch: Romney wool (July 2016, knit into a scarf)

Second batch: Cheviot wool (August 2019, spun & stashed)

Comments
Post a Comment